At home I attempt to maintain two networks — a reliable home network with WiFi and internet access and a separate home lab where services may not be as reliable. These networks overlap at times (for example, the home lab still needs internet access) but I don’t want to end up in a situation where the lab needs to be working for watching something on Netflix.
One place where these two requirements sometimes conflict is around name resolution. I would like everything on my home network to be able to resolve my lab resources, but I don’t wan to point everything at my lab DNS server.
The best solution I’ve found for this has been Pi-hole (https://pi-hole.net/). This is a service that can run on a variety of platforms and provide network-wide ad blocking — and more.
I have two instances of this running in my lab — one runs on a Raspberry Pi (to be separate from my lab infrastructure) and another backup instance runs in an Ubuntu 20.04 VM.
Deploying Pi-hole in a VM
This couldn’t be easier. I started with an Ubuntu Server 20.04 VM (using the template from here & the deploy process from here). I then ran the easy installer method by piping the install script to bash using:
curl -sSL https://install.pi-hole.net | bash
I followed the wizard and accepted the defaults. At the end of the process I changed the autogenerated admin password to something easier to remember. You can do this with the command:
pihole -a -p
Once this is complete, you can update DHCP scopes to use your Pi-hole IP addresses as the DNS server(s) for your network.
Customizing to resolve Lab domain names
Once clients are using Pi-hole to resolve DNS names, we can enable conditional forwarding to handle lab specific domains. In the Pi-hole web interface there is an option to enable this (under Settings > DNS > Advanced DNS settings), but it only supports a single domain name and target DNS server. For my lab, I have a couple additional names that need to be resolved, but this is still possible using configuration files.
From an SSH session to the Pi-hole DNS server, we can create a file using a command/path such as:
nano /etc/dnsmasq.d/05-custom.conf
In this file we will add server entries for any domain name we want to forward. Multiple entries should provide redundancy in the event one of our lab DNS servers is unavailable.
server=/lab.enterpriseadmins.org/192.168.10.10
server=/lab.enterpriseadmins.org/192.168.99.10
server=/example.com/192.168.10.10
server=/example.com/192.168.99.10
server=/168.192.in-addr.arpa/192.168.10.10
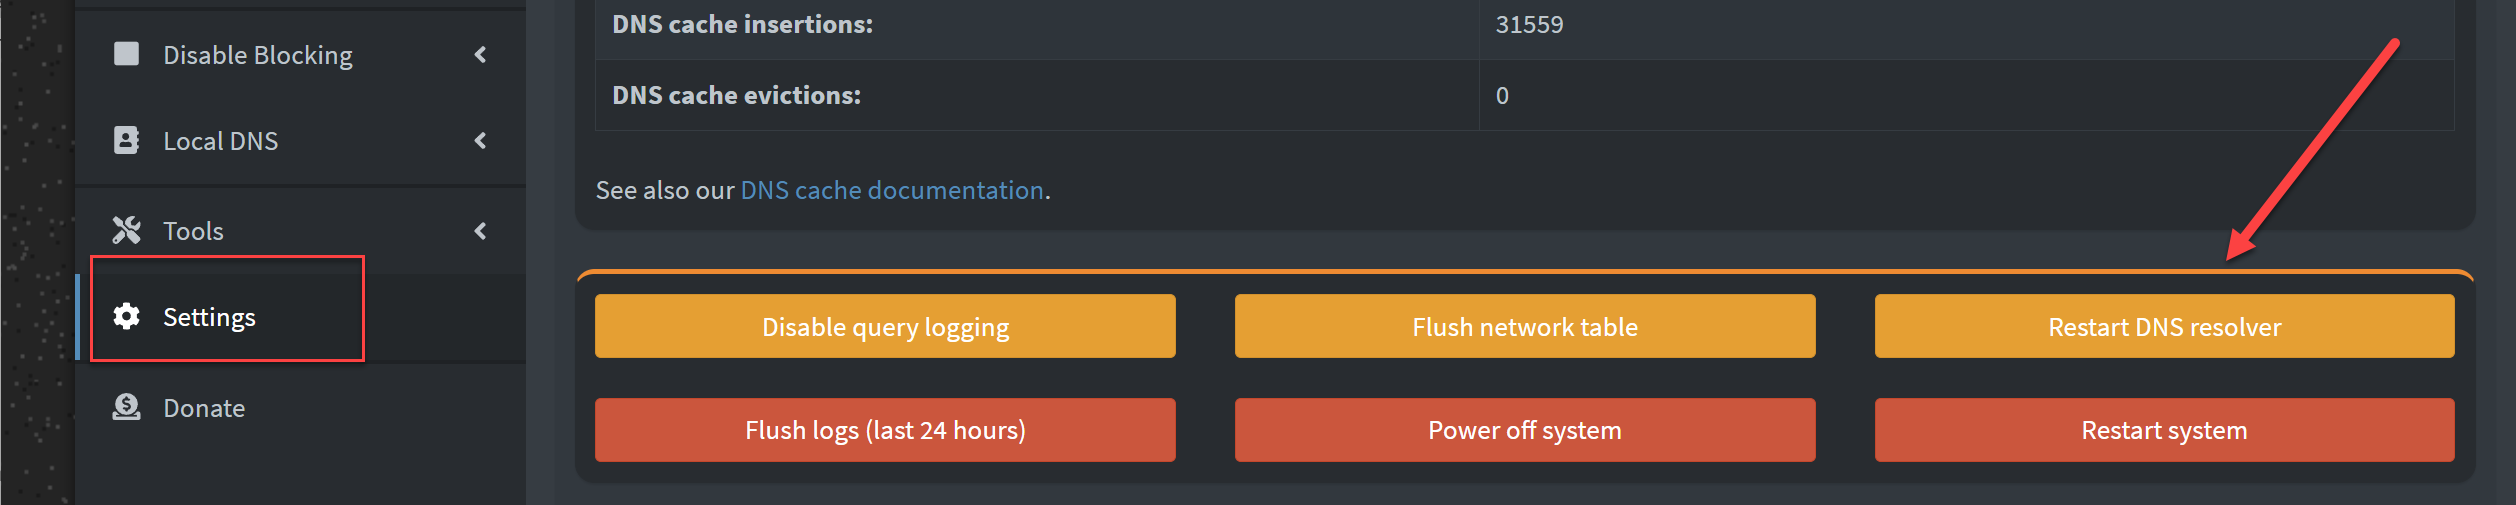
server=/168.192.in-addr.arpa/192.168.99.10I did find that I had to restart the DNS Service in order for this to take affect. While there are a few ways to accomplish this, I did it through the Pi-Hole Admin UI by clicking the “Restart DNS resolver” button on the Settings tab
NTP while we are at it?
One other service that I run on this Pi-hole VM (and Raspberry Pi) is NTP. While not the main purpose of this post, I’ll list the commands below to enable an NTP Server on Ubuntu 20.04.
apt install chrony
Once chrony is installed, we can configure it by editing the configuration file:
nano /etc/chrony/chrony.conf
We can review which upstream DNS servers are used, but more importantly we need to define which systems can use this host as an NTP server. We do that my adding the following lines to the end of the configuration file:
# Define the subnets that can use this host as an NTP server
allow 192.168.0.0/16
Which will allow any device in the 192.168.0.0/16 network to be able to query us for NTP. You can list additional ‘allow’ lines as needed.
Once the configuration file is updated, we can restart the service to apply changes using:
systemctl restart chrony.service
We can now query the NTP server using a variety of tools. On Windows I prefer ntptool.exe (https://www.ntp-time-server.com/ntp-server-tool.html). This should show the output that we were successfully able to query the new time server.
From the NTP server we can list recently checked in clients using the command:
sudo chronyc clients
Conclusion
Now we have an appliance that can provide DNS and NTP for our home network, and will forward any lab specific DNS queries to lab DNS servers. If those lab DNS servers are unavailable it doesn’t impact our home network.
Pingback: Learn how to monitor Pi-hole with vROps using the Management Pack Builder | Enterprise Admins.org