I was recently working with Horizon View and VMware Identity Manager in a lab environment. To recreate a specific issue, I needed to enable two-factor authentication. I found a great article describing how to setup RADIUS with Google Authenticator to make this happen (https://blogs.vmware.com/consulting/files/2015/02/VMW_15Q1_TD_Horizon-View-Google-Authenticator_021715_FINAL_EMonjoin.pdf). Unfortunately I ran into a few issues, most likely because I was trying to use a newer version of Ubuntu. I wanted to document the updated steps in case I need to recreate this configuration in the future.
To start, I deployed an Ubuntu 16.04.1 template and joined it to Active Directory. For those steps, you can check out this post: http://enterpriseadmins.org/blog/virtualization/lab-template-ubuntu-16-04/.
VM in hand, and joined to Active Directory, I installed the RADIUS and Google Authenticator modules:
apt-get install libpam-google-authenticator freeradius -y
I then changed the radiusd.conf file to all the user and group to be root for this process. This is needed as Google Authenticator requires the .google_authenticator file created later to only be readable by the user. Running this process as root allows the radius process to read these files as well.
nano /etc/freeradius/radiusd.conf
Find the lines that state user=freerad and group=freerad. Update each to look like:
user=root
group=root
We now update the users authorized to use Free RADIUS. We reject requests from users in a specific group, and then tell FreeRADIUS to use PAM for all other authentications. We do this by removing some comments, and adding a line in the freeradius/users file:
nano /etc/freeradius/users
DEFAULT Group == "lab_radius_disabled", Auth-Type := Reject
Reply-Message = "Your account has been disabled."
DEFAULT Auth-Type := PAM
We now need to update a file to enable pluggable authentication modules in free RADIUS. Note: to find text using nano, you can use CTRL+W.
nano /etc/freeradius/sites-enabled/default
When we find the text for #PAM, remove the pound sign to enable PAM.
The default PAM RADIUS config only expects a password. Since we want to use our Google Auth code, we need to make a few changes.
nano /etc/pam.d/radiusd
Comment out the @include lines in the file, then add the following text:
auth requisite pam_google_authenticator.so forward_pass
account required pam_unix.so use_first_pass
Now we need to define which clients can use our RADIUS server, and what their ‘secret’ will be. It is common to restrict this so only specific hosts can access RADIUS, and each server can have a unique secret. However, for my lab, I’m going to allow all servers to connect to RADIUS using the same secret. We do this by editing this file:
nano /etc/freeradius/clients.conf
And adding a client entry like this one:
client 192.168.0.0/16 {
        secret          = s3cur3.rad
        shortname       = PrimaryLabSubnet
}
Note – alphanumeric and _-+. (underscore hyphen plus period) are the supported characters for this secret (from https://support.software.dell.com/kb/154463
Now that we have all of the configuration files edited, we can restart the freeradius service:
service freeradius restart
You are almost there…
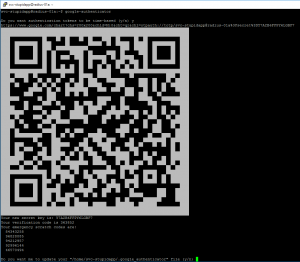
Users will need to login (SSH) to our RADIUS server to generate their specific Google Authenticator key. This only needs to happen once (unless they need to regenerate their unique key). By default, a user can just enter ‘google-authenticator’, answer half a dozen questions, and will get a QR code for their unique key.
To ensure that each user answers these questions the same, lets pre-answer them… by creating an alias for all new users. To save a few characters, we’ll shorten this alias to google-auth.
nano /etc/skel/.bashrc
Now we scroll down to where the other aliases are and add one of our own:
alias google-auth='google-authenticator -tdf -l "$USER Home Lab" -r 3 -R 30 -w 17 -Q ANSI'
This file will automatically be copied to the .bashrc folder for all newly created profiles. If you’ve already logged into your Linux box and want this handy alias, you can edit your personal /home/username/.bashrc file, or just copy the default .bashrc for new users into your profile, like this:
cp /etc/skel/.bashrc /home/bwuchner/.bashrc
Option #1, new users
The first time a user logs in, they will need to create a unique key for their account. To do this, they simply type
google-auth
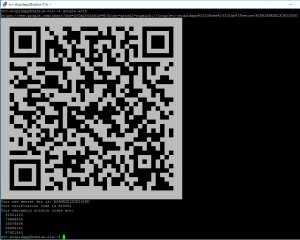
and lanuch the quick alias we just made. This will generate a QR code they can use to add the account to their mobile device.
Option #2, existing users
I have several labs, each with their own RADIUS servers. Instead of having a unique key per lab, I re-use my Google Authenticator key across environments — don’t tell my info-security team 🙂
To do this, I just need to copy the contents of /home/bwuchner/.google_authenticator to other RADIUS servers. Since this file only contains simple text, I pass it into a text editor over SSH.
nano .google_authenticator
We add our key text, which looks like this:
A2ANXSELX3KIS5DD
"RATE_LIMIT 3 30
" WINDOW_SIZE 17
" DISALLOW_REUSE
" TOTP_AUTH
52311114
79666855
35676886
84689191
97921843
Note: In the real world you’d like to be much more security conscious of this text, as it represents the ‘something you have’ factor of authentication. Anyone who knows this text can easily impersonate you.
The file must be readable only by the current user, so change permissions with:
chmod 400 ~/.google_authenticator
Thats it! We can now test that everything is working using radtest. Here is simple syntax, assuming my username is bwuchner, password is P@ssw0rd, RADIUS server is 192.168.0.100 and RADIUS secret is s3cur3.rad:
radtest bwuchner 'P@ssw0rd442287' 192.168.0.100 1812 s3cur3.rad
The response should show Access-Accept. If you get something else, like Access-Reject, then check /var/log/auth.log to see what went wrong. I find that it is easiest to have two SSH sessions opened — one running radtest and the other running
tail -f /var/log/auth.log
Good luck, I hope this helps make your lab authentications more secure!


You can examine https://www.kaplansoft.com/tekradius/Docs/Google-Authenticator.pdf for a Windows based implementation for Google Authenticator with RADIUS.
Hi,
did you test it with a local Linux user or with an Active Directory Users? I want to Combine Freeradius with Active Dirctory and Google Auth. So, how can i integrate AD Users and create Google auth for an AD User.
Thanks
Mouhcine
I only tested with an Active Directory user. These steps used the pbis-open component to join the linux system to active directory, after doing to an active directory user can login to Linux using their AD credentials to create their google authenticator token.
Thanks so much for your in depth write-up. I am very new to Linux and this is really the first server that I’ve tried to establish. My goal is to use google-authenticator for 2-factor authentication on our Cisco ASA VPN.
I’m having a bit of trouble getting my freeradius server up and running properly though. I’ve installed Ubuntu 17.10.1 on a VM and my installation of freeradius has an additional “3.0” directory that I’ve appended to the necessary paths. The recommended changes to the following files will not allow the freeradius service to start.
/etc/freeradius/3.0/users
/etc/freeradius/3.0/sites-enabled/default
When those changes in place I get a “Job for freedadius.service failed because the control process exited with error code.” “journalctl -xe” shows me an error “/etc/freeradius/3.0/sites-enabled/default[513]: Failed to find “PAM” as a module or policy.” Is there something in my installed version of Ubuntu that I need to change in these two configuration files?
Removing the changes to those two files allows the freeradius server to start and I can run the google-auth alias, but my radtest command doesn’t seem to work. My error could certainly be somewhere else (even in my radtest syntax), but I was hoping that you might be able give me push in the right direction knowing that I don’t have the “PAM” configuration set up.
I haven’t tested this with Ubuntu 17.10 yet… I’m assuming it includes updates to freeradius if you have a 3.0 directory (as that does not exist on 16.10). Have you thought of using Ubuntu 16.10 instead? It is the LTS (Long Term Support) branch and is supported until 2021, where as 17.10 only appears to be supported till July 2018.
I have no reason to really be using v17, so I’ll give 16.10 a try and see if that does the trick.
Utilizing Ubuntu 16.04.4 and following your write-ups on “Lab template: Ubuntu 16.04” and “Build Your Own Two Factor Authentication Server” got me up and running. Thanks so much for the help. Now I just need to hook it up with our Cisco ASA for VPN Access.
hi all,
i want to ask for easy way to add users, now we adding them one by one and turn to every user by su command , and run google authenticator to generate profile (Key), we have a lot of users because we using this to authenticate VPN users , am asking about something like raduis database to just insert users and automatically run google authenticator.
Newer versions of Ubuntu e.g. 18.04 are using FreeRADIUS 3.0 and the package is not creating a symlink that is required to start the PAM module. This is causing Todd’s error.
To fix it issue:
ln -sf /etc/freeradius/3.0/mods-available/pam /etc/freeradius/3.0/mods-enabled/pam
freeradius -X , will show clean
service freeradius restart , will restart the service successfully